
As we’ve been making a lot of websites for businesses around Melton Mowbray and Oakham recently, we thought we’d share a bit of know-how with any budding web designers out there.
Welcome to your crash course in HTML coding!
There are lots of coding languages that a web browser understands and people write websites in a variety of ‘languages’. The easiest one to pick up is HTML (Hypertext Markup Language).
To write your first web page, all you need to do is launch notepad on your computer and get typing – It’s as simply as that!
The code
On the first line of your new notepad file, you need to tell it what langage you’re using. In our case it’s HTML. All HTML ‘tags’ are written within pointy brackets, like this < and this >.
Your first line will therefore be <!DOCTYPE html>.
On the next line, we’re going to tell it that the HTML code starts here. This is done by typing <html> (see that it is enclosed within two pointy brackets).
There’s an example below, you can see that I have told it on the third line that I’m starting the body of my page next, i.e. the stuff you see in your browser window. This is market with an opening <body> tag.
On the next line I’ve got a heading. Headings come in a variety of sizes from Heading 1 to Heading 6. Heading one (written as h1) is the largest, 6 is usually the smallest. In my example, I’ve used heading 1.
You can see in my example below that my large main heading says “Hello – look at me!. At the end of my heading, I’ve told my web browser that the heading is now finished by using a CLOSING h1 tag. That looks like this </h1>. Note the forward slash. This signifies that it is a closing tag i.e. the END of somthing.
On the next line I have a paragraph of text. Paragraphs are written with <p> tags. There’s an opening tag; <p> at the start, and a closing tag; </p> at the end of the paragraph. You can see my paragraph says “My first paragraph”.
Finally, I’ve decided that’s the end of my web page. Therefore I need to tell it that we’ve reached the end of my body of content, by using the closing body tag; </body> and that we’ve reached the end of my HTML code by using the closing </html> tag.
My Example
My example code looks like the below. If you wish, you can copy and paste that into your own notepade file.
<!DOCTYPE html>
<html>
<body>

<h1>Hello - look at me!</h1>
<p>My first paragraph.</p>

</body>
</html>
Finally, save your notepad file. By default, notepad files are saved with the .txt file extentions (txt at the end of the filename). You need to change that to .html instead. So call is test.html (or whatever you want to call it – just make sure it has a file extension at the end of .html).

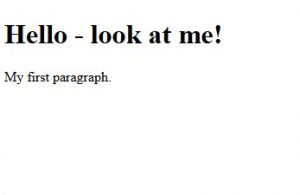
Now if you double-click your file to open it, it should launch in your favourite web browser and you’ll see a very exciting web page that looks something like this:
Add an image
That’s a bit boring, right?
Why don’t we add a picture?
There’s an image of our logo on our website that we uploded to our web server. The address of the picture is:
Now to add an image, not only do we need the address of the picture (above), but we also need to use some code to tell our browser to display an image.
This is done using an image tag, which looks like this <img>. Within that image tag we also need to specify the source of the image, i.e. that long address above. The word source is shortened to src and the image source is enclosed within speechmarks.
Put all that together and it’s not as complicated as it sounds.
The code to add that image to my web page looks like this:
<img src="https://clickandsimple.com/wp-content/uploads/2023/09/cropped-click-and-simple-logoGreyTextTRASNPARENT-1.png">I’ve decided I’d like that image to appear after my heading but before my paragraph, so my code for the entire page now looks like this:
<!DOCTYPE html>
<html>
<body>

<h1>Hello - look at me!</h1>
<img src="https://clickandsimple.com/wp-content/uploads/2023/09/cropped-click-and-simple-logoGreyTextTRASNPARENT-1.png">
<p>My first paragraph.</p>

</body>
</html>
If I save that again as test.html, then open my hml file, my web page now looks like this:
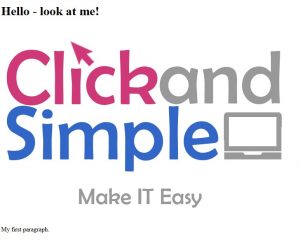
I think that image is too big. I want to resize it.
I’m going to change my image tag so that the image is much smaller. I’ll make it 200 pixels wide and 100 pixels high (things are measured in pixels in basic html),
So my code now looks like this:
<!DOCTYPE html>
<html>
<body>

<h1>Hello - look at me!</h1>
<img src="https://clickandsimple.com/wp-content/uploads/2023/09/cropped-click-and-simple-logoGreyTextTRASNPARENT-1.png" width="200px" Height="100px">
<p>My first paragraph.</p>

</body>
</html>
This makes my page look like the one below. The image is much smaller, but notice how it now looks stretched. If you reduce the width or height, you must ensure you reduce the opposite dimension proportionally. If I reduce the width by 50%, I must also reduce the height by 50% or it will look stretched.
Have a play with it, mess around with the number of pixels high and wide, re-save your file and open it again.
Maybe try changing the heading tags from <h1> and </h1> to <h6> and </h6> to see what that does.
If you want to learn more, check out this guide from Microsoft.
This website also explains things well and goes into some details about create links to other pages.